
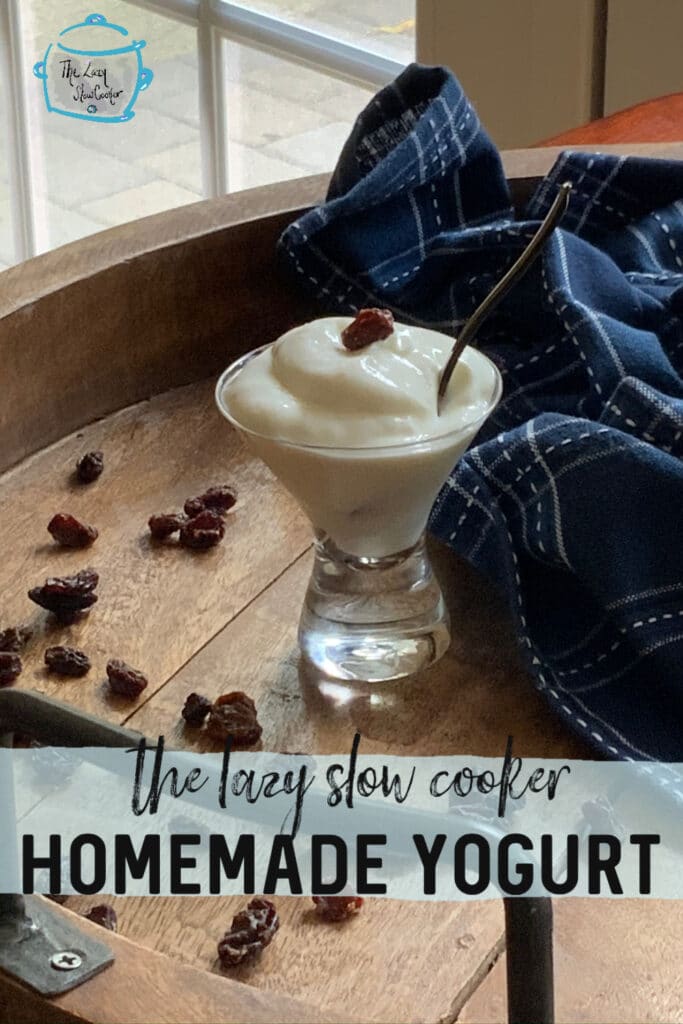
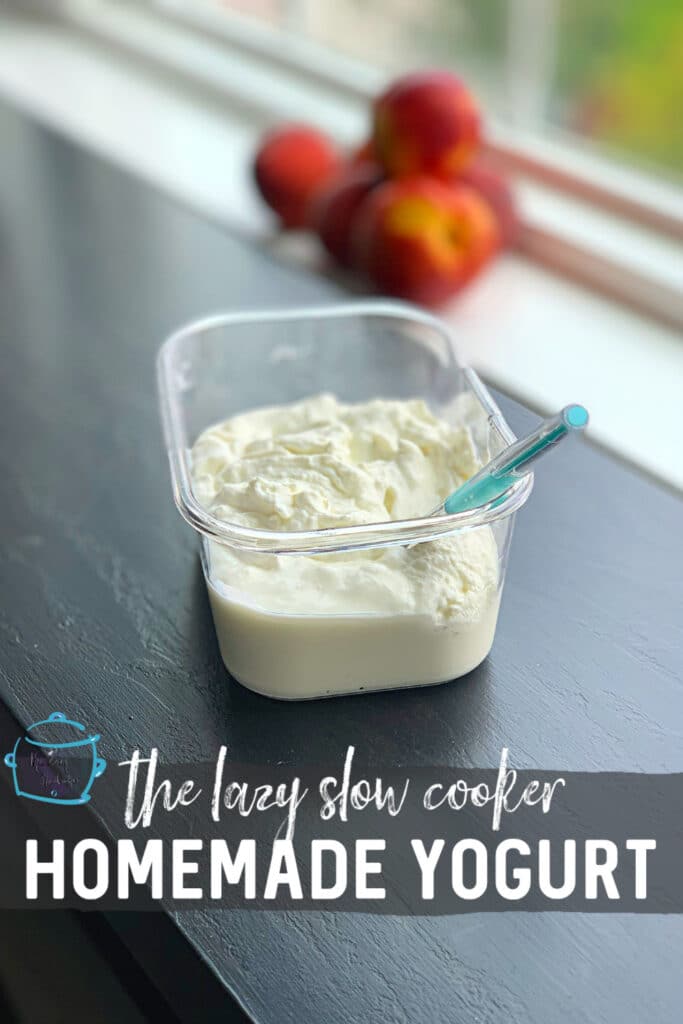
Use your crockpot to make deliciously creamy, and wonderful slow cooker yogurt. It is an economical way to make organic yogurt that can be enjoyed any way you like!
Jump to:
There is something special about creamy plain yogurt. It is the culinary equivalent of a blank artist's canvas just waiting to be turned into a beautiful masterpiece.
Yogurt can be served sweet or savory. It can be eaten plain, with tons of different mix-ins, or as a topping. You can even use it as a healthy ingredient when baking.
But the best news of all? You don't need a yogurt maker to make this delicious creation
Why make your own yogurt?
There are lots of great reasons to use your crockpot to make yogurt. Here are the top few:
- You know exactly what is going into it. Homemade yogurt never has ingredients you can't pronounce. You are in complete control. Want to make sure your yogurt is fully organic and natural? Easy! Just use organic ingredients.
- It is economical. This is particularly true if you currently buy organic yogurt or if you usually buy yogurt in individual serving containers. No need to buy expensive yogurt when your own slow cooker yogurt is better!
- Fresh always tastes best! When you are making your own yogurt - it just doesn't get any fresher than that.
- As with all crockpot dishes you have the added benefit of being able to cook without adding extra heat to the house.
- It is a great dish to make with kids. This recipe can be used as an educational tool since it is basically an edible science experiment! You will be teaching how to grow beneficial bacteria.
How to make it
The process of making yogurt happens in stages. No stage is difficult. However, you do need to keep an eye on timing and scheduling more than the average slow cooker recipe.
Stage one - heating milk
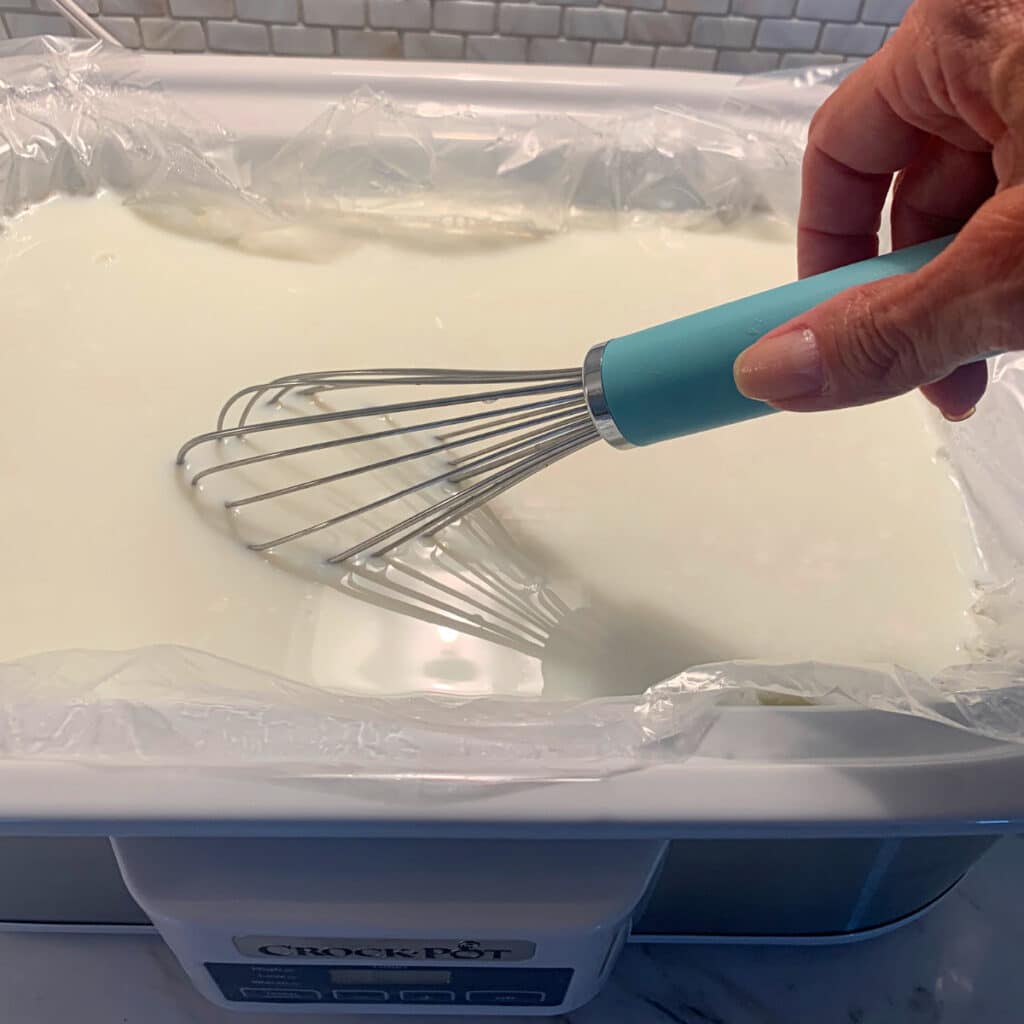
Start by heating one-half gallon of milk in your slow cooker. You should heat it until it reaches an internal temperature of 180 degrees F. You can use any level of fat in your milk depending on what you want for your end product. Whole milk yogurt is delicious, but I almost always use skim milk.
Each slow cooker is different so actual heating times will vary. As a rough guide, when I use my oval, 6 qt cooker, it takes about 2 hours. In my 3.5-quart casserole crockpot, it takes 3 hours. The first time you make yogurt you will need to keep an eye on it to get the right time.
Stage two - cooling milk
Once you have confirmed that your milk has hit 180°F, turn your slow cooker off and leave it covered. Allow the milk to cool to between 110°F and 120°F. 110°F is the ideal temperature for the good bacteria in yogurt to grow. This stage should also take about 2-3 hours.
Stage three - add yogurt
When the ideal milk temperature has been reached, carefully but thoroughly stir in ½ cup room temperature plain yogurt. Make sure your yogurt contains "live active cultures". This is the good bacteria that needs to grow in order to turn your warm milk into yogurt.
If you want a fat-free finished product, use fat-free yogurt and milk. If you want an organic batch, start with organic yogurt and milk.
Stage four - turning milk into yogurt
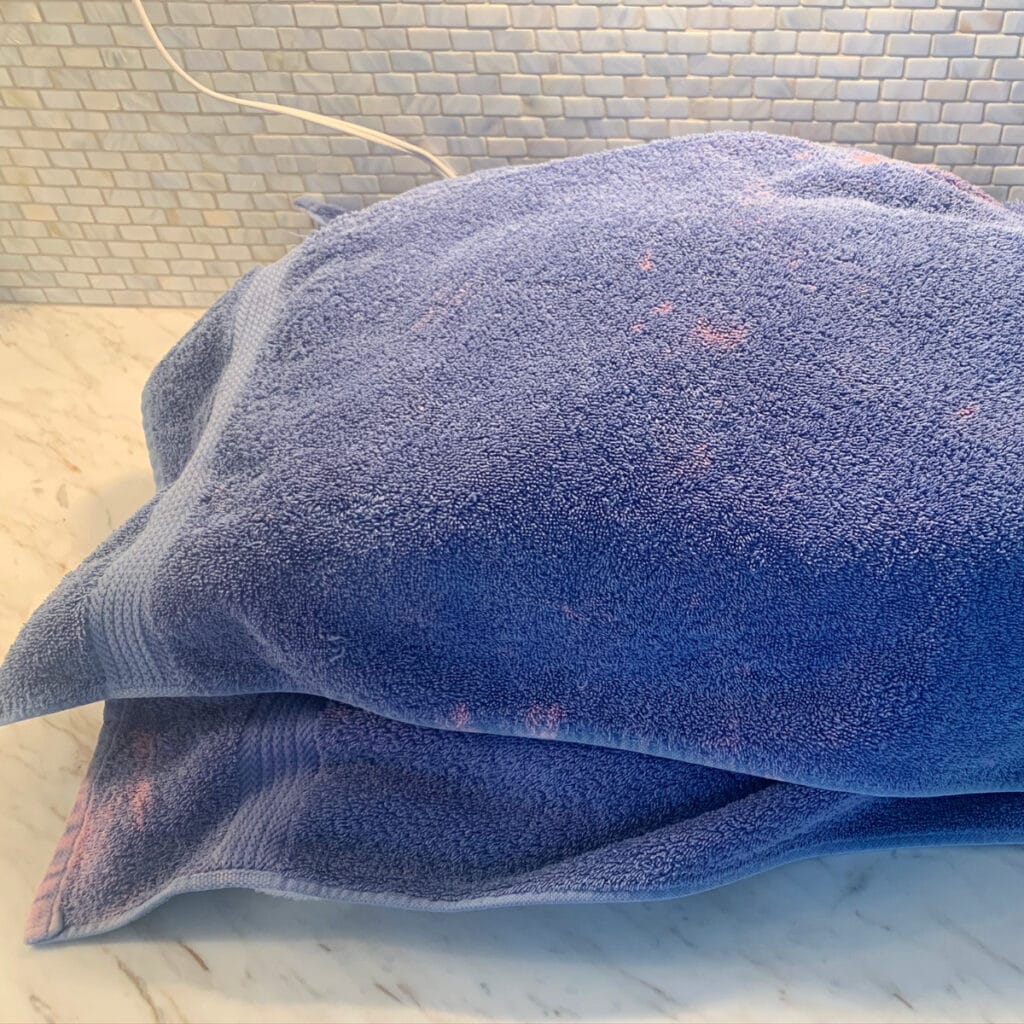
The best environment to grow bacteria is a dark one. So, after mixing, replace the slow cooker lid and cover with dark towels. The goal is to block out as much light as possible.
Your milk/yogurt mixture needs to sit for 8-12 hours to fully turn into yogurt.
After about 6 hours on your kitchen counter, you can move the mixture into the refrigerator if you need to. This will allow you to leave the mixture overnight or beyond the 12-hour mark. You won't run the risk of growing harmful bacteria along with the good yogurt culture!
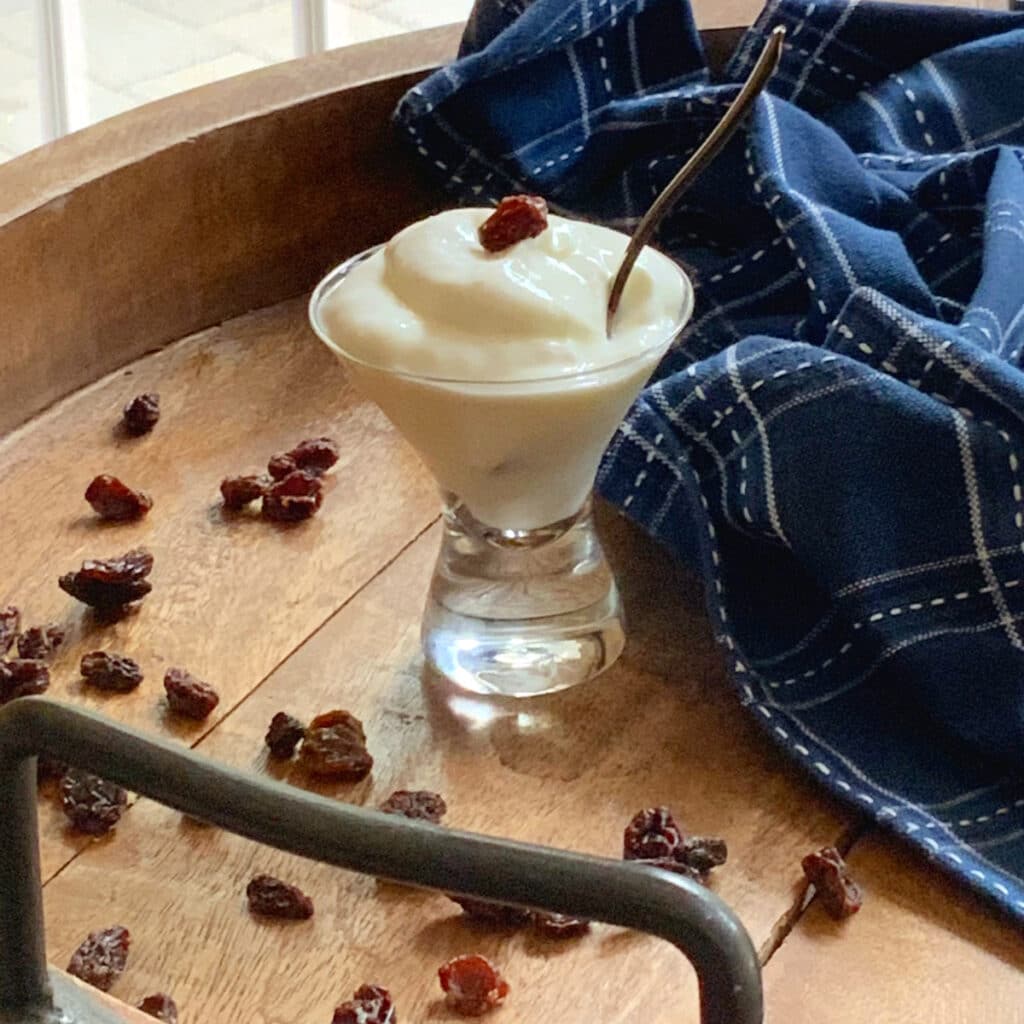
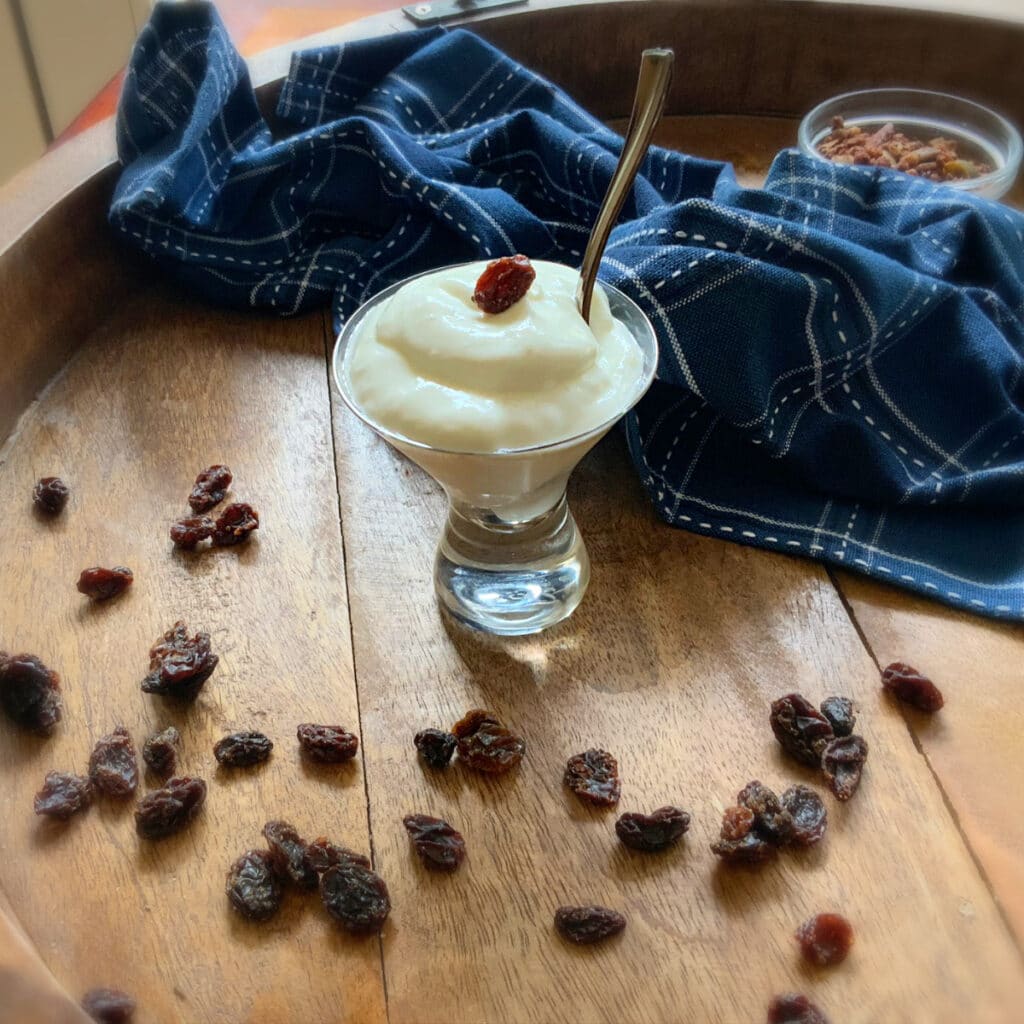
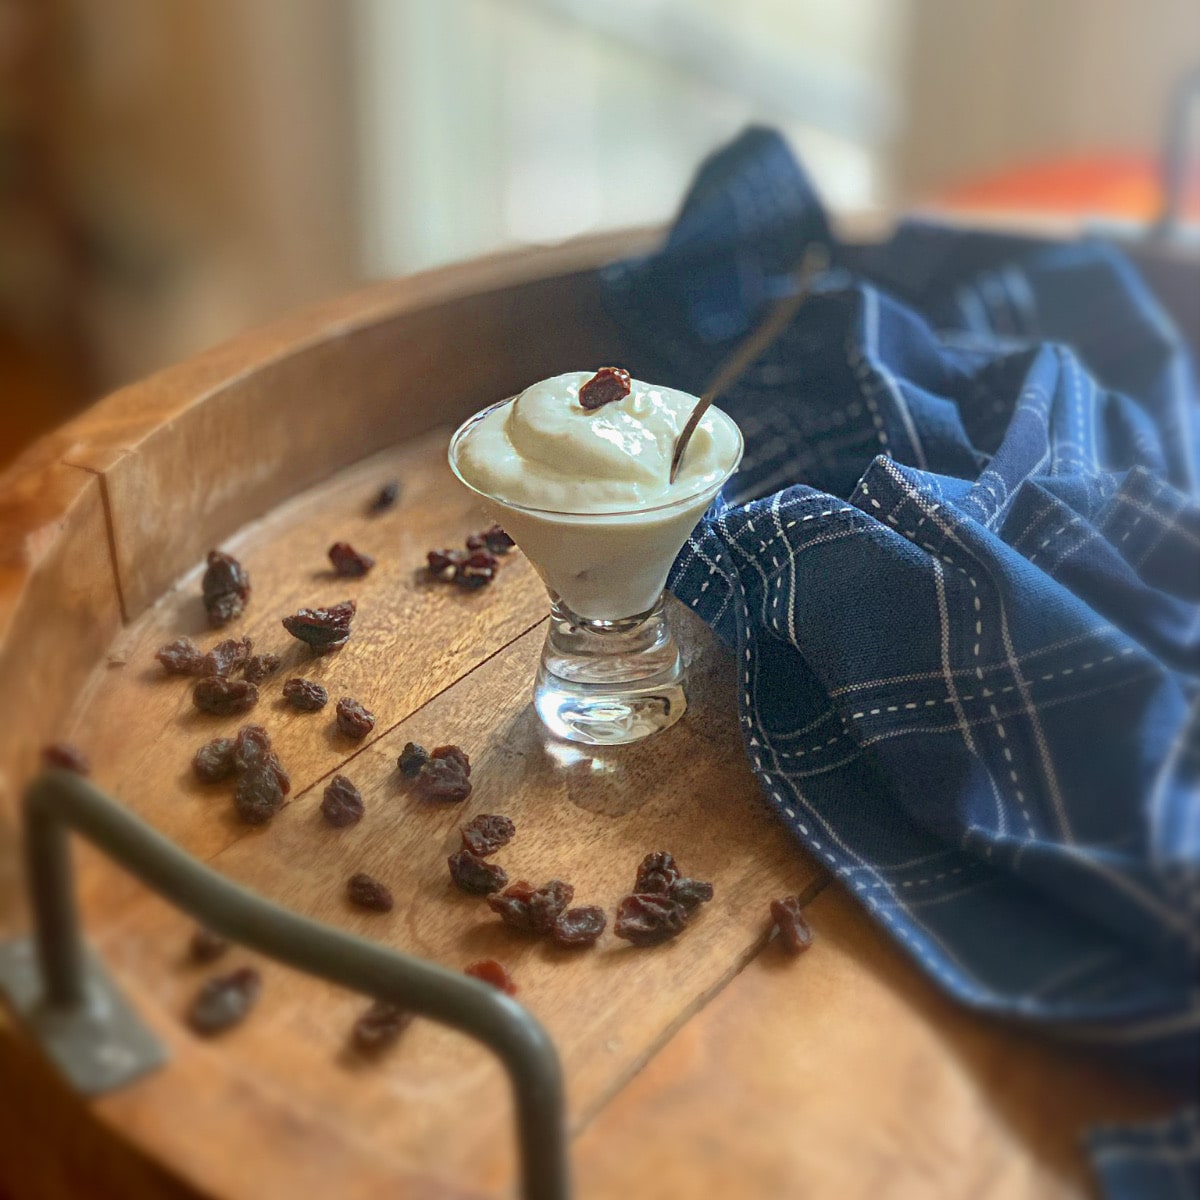
You've got yogurt!
After 8-12 hours, you can uncover your yogurt! There will be a watery layer on top. Pour this off and your regular, plain yogurt is ready to serve!

Want to save this recipe for later?
But wait - there's more!
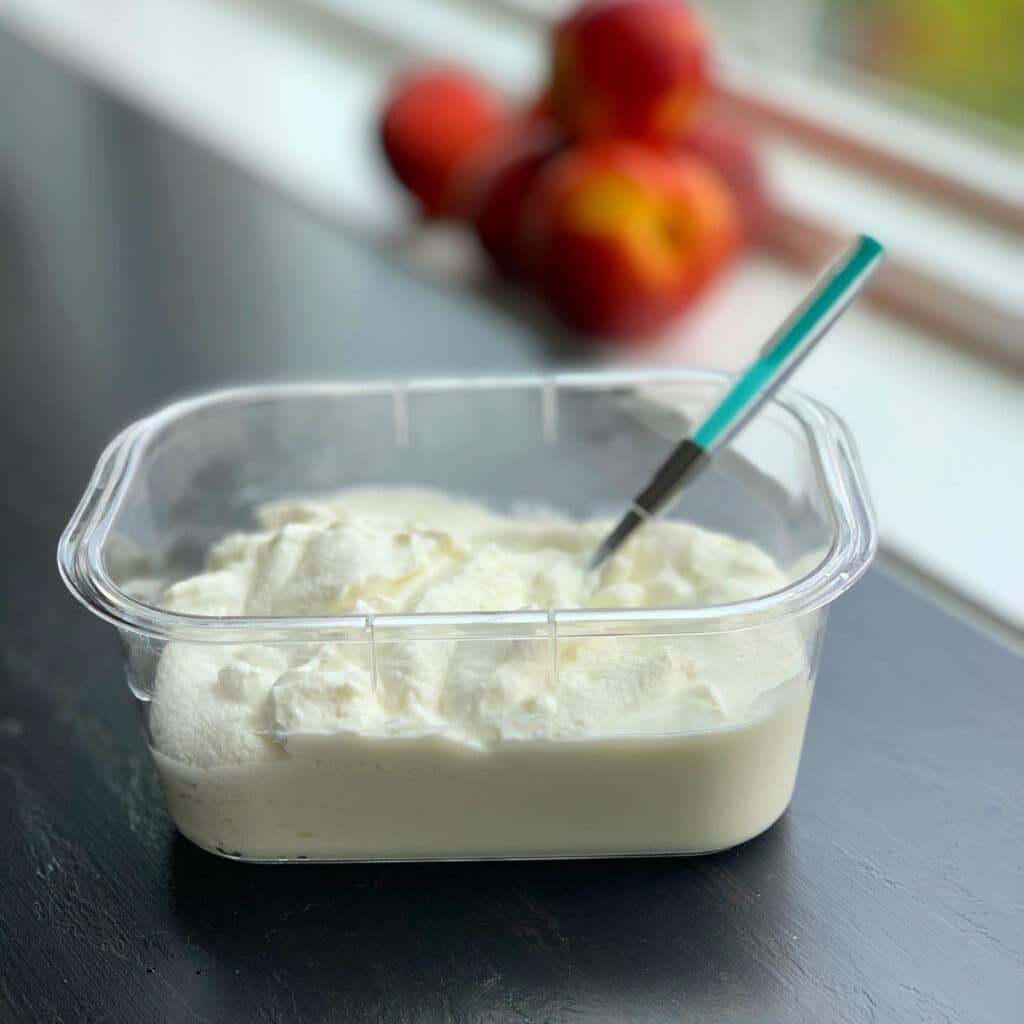
If you would like to turn your yogurt into thicker Greek-style yogurt, you aren't quite finished. For that, you will need to use a fine strainer that is good for yogurt. Alternatively, you can line a regular strainer with cheesecloth.
Pour your yogurt mixture into the strainer/cheesecloth and allow it to drain over a bowl. The longer you let it drain, the thicker your yogurt will become.
If you love this recipe...
Please let me know in the comment section below!

Serving ideas
There are so many delicious ways to serve fresh, yoghurt that I couldn't possibly list them all. My most favorite way is to use it in baking recipes.
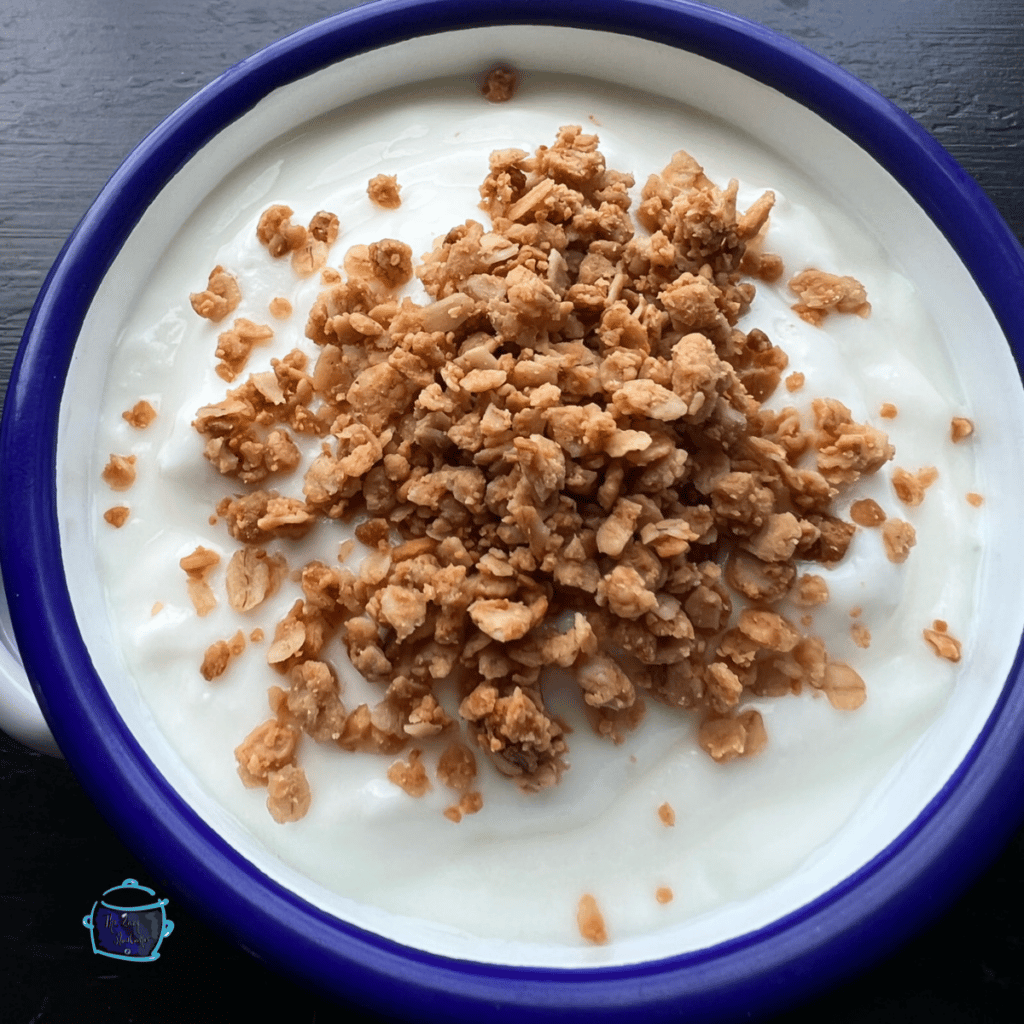
You can also use it as a topping for items such as baked potatoes, tacos, and fresh fruit. Or, it can be used as a base for mix-ins such as fresh fruits, nuts, raisins, granola, or chocolate chips.
To keep it basic, you can make vanilla yogurt by adding in your favorite sweetener and some pure vanilla extract. This, of course, works with other extract flavors as well. Additional great yogurt flavor enhancers include honey, maple syrup, or a flavored sauce such as blueberry sauce or salted caramel pear butter.
Oh - and I almost forgot what a perfect ingredient it is to use in savory dips and salad dressings. The list is truly endless.
"I have used the Lazy Yogurt method for years and love the easiness of it. My family loves it and gobbles up all the yogurt. Thank you so much!
- A reviewer on Facebook
Storing yogurt
Store your crock pot yogurt in airtight containers. Store single servings in individual containers for easy grab-and-go meals or snacks.
Healthy Eating Hint
Keep a small bowl of yogurt in the front of your fridge beside some prepped pieces of your favorite fruit. This will allow you to grab a healthy snack very easily.
Expert tips to make the best yogurt
- Always set aside ½ cup of your own homemade yogurt. This way you will have some live cultures on hand to use as a starter culture for your next batch. For the first batch, you will need to purchase yogurt with live active cultures.
- Since this recipe relies heavily on temperature, a good food thermometer is key.
- If you prefer that your homemade yogurt be organic, always start with organic milk and organic yogurt.
- Slow cooker liners are an optional but helpful hack whenever using a crockpot. They allow you to cook with little to no cleanup. I like to buy mine in bulk for a better per-piece price.
- Don't have cheesecloth for straining your yogurt? Coffee filters can be used in a pinch to help with this part of the process
- In the market for a new slow cooker? A crockpot with a built in thermometer makes this recipe a bit easier to track.
- Looking for delicious homemade granola to go along with your homemade yogurt? I am addicted to peanut butter granola!!
As an Amazon Associate, I earn a small amount from qualifying purchases and affiliate links at no additional cost to you.
📖 Recipe
Lazy Slow Cooker Yogurt - Greek and regular
(Click on the stars to leave a rating)
Print Pin Rate SaveAll nutrition information shown here is automatically generated and should be considered an estimate. If you follow a specific diet, please calculate your own values to ensure accuracy.
Equipment
- 3.5 qt or larger crockpot
- measuring cup
- strainer a yogurt strainer is great, but a regular strainer will work with cheesecloth as a lining.
- large mixing bowl
- cheesecloth optional
Ingredients
- ½ gallon fat free milk
- ½ cup yogurt with live and active cultures
Instructions
- place slow cooker liner into slow cooker, if using
- pour milk into slow cooker, cover and cook on high for 2-3 hours (depending on your slow cooker) or until milk temperature reaches 180°F. It takes me just about exactly 2 hours in my 6qt Crockpot brand slow cooker.½ gallon fat free milk
- turn off slow cooker and allow milk to cool to between 110° and 120°F
- while milk is cooling, allow ½ cup plain yogurt with live active cultures to come to room temperature½ cup yogurt with live and active cultures
- when milk is as close to 110°F as possible (but not less), carefully mix room temperature yogurt fully into milk
- replace cover and then drape slow cooker with a towel (or two) for up to 8-12 hours. It is important that the yogurt/milk mixture to be in the dark. After about 6 or so hours, you can move your crockpot into the refrigerator if you won't be able to get to it before the total timing exceeds 12 hours. This will allow you to handle the next step when your schedule permits
- after sitting, your yogurt will have a layer of liquid on top of it. If you want regular yogurt, just pour off the top layer and serve!
- to make Greek yogurt, place cheesecloth into a yogurt straine or a strainer lined with cheesecloth. Place strainer into a bowl that has room for draining.
- add yogurt into cheesecloth/strainer and allow extra liquid to drain. This can be done in the refrigerator or on the counter. The longer you allow it to drain, the thicker and more creamy your yogurt will be (but the less volume of yogurt you will have).
- enjoy your homemade yogurt!!!
Final Step
If you love this recipe, please let everyone know by giving it a star rating and leaving a comment. This will help my business to grow and allow me to keep on testing and sharing free recipes with you.😊
Notes
- Be sure to set aside ½ cup of your homemade yogurt so that you can use to make another batch.
- This recipe calls for fat free milk and yogurt as written. However, it will work with any level of fat you prefer in both your milk and starter yogurt.
Nutrition
All nutrition information shown here is automatically generated and should be considered an estimate. If you follow a specific diet, please calculate your own values to ensure accuracy.
Check out my latest on Instagram


Jennifer Dow says
Great recipe and detailed instructions! I followed the recipe, with the addition of a tip from someone else - line the strainer with paper towel if you don't have cheesecloth! The yogurt just slid right off into the container. One other note - I think there is a typo in the instructions - should it be add 1/2 cup of yogurt to the milk, instead of 1/4 cup?
The Lazy Slow Cooker says
Hi Jennifer! Thanks for your kind words about the instructions. And - I love that tip about the paper towel! I am going to try that one out for sure!! You are correct about the typo. Not matter how many times I proofread, I always miss something. Thank you so much for pointing it out. It has been corrected!! ☺️
Megan Hauser says
Mine turned out to be more of a drinkable yogurt consistency. It might have been a little warm when I added the starter yogurt to the crock pot, but I'm not quite sure where I went wrong.
The Lazy Slow Cooker says
Hi Megan,
Sorry to hear that 😔. I can only guess at what might have gone wrong, but adding the starter yogurt before you hit the recommended temp range can kill off the good bacteria and that certainly might have been the problem. Thanks for sharing!
Stel says
Please give me a serving size on the yoghurt recipe that made in a slow cooker,is 1/2 a cup 1 serving from that batch of yoghurt you made,on a diet so need the serving size,thankyou!
The Lazy Slow Cooker says
Hi there! Based on my calculations, a serving should be right around 2/3 of a cup. The calories show assume that you are using fat free milk and fat free yogurt as your base.
I hope this helps!
Susan
Kim says
Hey! Would it work to add vanilla to the milk before it cools to get that flavor later on, or is it best to add after the yogurt is made?
The Lazy Slow Cooker says
That's a great question. I have never tried it. But, vanilla does well at all temperatures, so I don't see why it wouldn't work. I may have to give it a try! If you try it before I do, I would love to hear how it goes!
Desirae says
i just made this yesterday and it turned out pretty thin, but still a yoghurt. when i do it again i wont use greek as a base and see how that goes. thank you for a simple recipe, most yoghurt ones are intimidating for a yoghurt noob
The Lazy Slow Cooker says
Thank you for sharing your experience! To make it thicker, letting it drain longer through the cheesecloth might help. I am so glad to hear the instructions weren't intimidating!!
Stephan Callis says
Instead of yogurt I saved the whey and it worked perfectly
Eliana says
Are you saying you saved whey to make new yogurt?
evelyn smith says
Hey
Can't wait to try this. If i want to add a sweetner to it (fussy hubby) do i do that while still processing or once done?
The Lazy Slow Cooker says
I add sweeteners after it is fully processed, just before serving. That way I can customize each serving based on the preferences of the person eating it at that moment. (I love adding a few drops of vanilla and some agave syrup!). Jellies and jams make great sweeteners too!
Bettie says
If I missed this in reading, I apologize.... What is your take on how long this is good for? Should I just go by whatever the soonest expiry date of the milk and yogurt used?
The Lazy Slow Cooker says
Assuming it is stored properly in the refrigerator, homemade yogurt is generally good for up to 2 weeks from the day you start the process of making it. If you plan to use some of your homemade yogurt to start another batch, that should happen within 7 days.
Thank you so much for asking this question as this information is currently missing from the post. I am going to update it and add it in!!
Enjoy your yogurt!!
Kee says
Hi, this looks wonderful!
Can I make this using milk alternatives? And at the end add in the live yogurt culture that is dairy?
Thanks!
The Lazy Slow Cooker says
Thank you!!
I have not tried this recipe using non-dairy milk as of yet (I plan too, though!). Some recipes using non-dairy milk include different kinds of thickeners, so they may all react a little differently to the culture process. Once I figure out a recipe that I like, I will post it for sure! In the meantime, if you decide to experiment on your own, I would love to hear how it goes!
Rebecca says
I can't wait to try it out. I'm wondering, do you think it would be okay to freeze it? I know with store bought yogurt it gets a grainy texture after freezing and thawing, but I am wondering how this would be.
Susan says
I am so happy to hear that you are going to try it out!
I would not recommend freezing and defrosting, though. In my experience, fresh yogurt like this is even grainier thawed that store bought. I wish it weren't the case. It is good to use in frozen yogurt though!!!
John says
After the milk has heated, do you leave the ceramic slow cooker pot in the slow cooker base, or lift it out to cool faster? Should it then be wrapped in towels to keep it warm for longer or just in top to keep it dark?
The Lazy Slow Cooker says
Hi John, Yes, I leave the ceramic insert in the base. The purpose of the towel is to keep it as dark as possible. Not for temperature control. Thanks for asking!
Kristy says
This is the third time I have made yogurt using your easy to follow straight forward recipe.. it turns out great every time! Easy to strain to make thicker Greek style yogurt too . Thanks so much love this 😁
The Lazy Slow Cooker says
Hi Kristy! Thank you so much for taking the time to share that. It is greatly appreciated. So glad to hear you are enjoying it!!
Michelle says
can iI freeze a half of a cup of the yogurt to make another batch with or will that kill the live cultures? I may not have to make another batch as soon as 7 days after the first batch.
The Lazy Slow Cooker says
Hi Michelle, while I have never actually tried it myself, it is my understanding that live active yogurt cultures can survive for a few weeks when frozen. So, you should be able to freeze it and still use it to make more yogurt. Allowing your yogurt to defrost slowly in the fridge before using it should produce the best results. I hope this helps!!
Aileen says
Thank you for sharing this recipe! Just a question - is there an expiration date on this yogurt?
The Lazy Slow Cooker says
Homemade yogurt should last about 2 weeks in the refrigerator. As with all yogurt, if it starts to smell rancid, look moldy or curdles, it is best to toss it.
Lexus says
If I use a whole gallon of milk do I need to double the yogurt added?
The Lazy Slow Cooker says
Yes. If you use 1 gallon of milk, you should use 1 cup of yogurt with live active cultures.
Thanks for asking!
Luisa Beck says
Hello! I accidentally posted this in the wrong spot earlier. I inadvertently let the milk reach 200°. Can I still let it cool and use the cultures or do I need to discard the milk and start over?
The Lazy Slow Cooker says
While I can't speak from personal experience, I have done some research that says milk can be heated anywhere between 180℉ and 200℉ when making yogurt. If this is the case, then allowing it to cool just a bit should work fine. I would love to hear how it turns(ed) out!
Luisa Beck says
Yes, I read the same on a couple other sites. I went ahead and let it cool and did everything as usual. The yogurt came out just fine this morning! Same great flavor as before (this is only my second time). Thank you so much!!
The Lazy Slow Cooker says
I am so glad to hear that!! Thank you for following up!
Julie Goodhue says
Please add the Serving size in the top of the recipe.
I love the way you breakdown everything except this is missing.
You have the number of servings listed but I need to know the size of an individual serving. As a mom of a child with diabetes, I count every carb that goes into him so I can dose his insulin. When I look at labels, I look at the number of servings and the size of each. And I measure it out. So he sees it and doesn’t over eat then getting a high Blood glucose. Let me know if you have any questions.
Thank you.
The Lazy Slow Cooker says
Hi Julie, I appreciate the feedback and am glad to hear that you enjoyed the way the information is broken down.
All nutrition information provided on my site is automatically generated by a recipe program. I am not a nutritionist or dietician and have no medial training. As such, I do not override or add to any of the information provided by the program I use.
Feby says
I just made this yesterday. Using a liter of milk that's a couple of days past it's due date, and a yogurt starter that's a couple of YEARS past it's due date (I kept it in the freezer the whole time). It still worked! 😄
I covered the crock pot with towels, then put the whole thing inside a cooler box.
I do think heating up the milk takes too long in the crockpot. But I like the thick ceramic as the incubator. So next time, I'll heat up the milk on stove top, while warming the crockpot. Then pour the mixture into the crockpot.
Thanks for the recipe.
The Lazy Slow Cooker says
Glad to hear that you had such great success with the recipe! What a great idea to heat up the milk a little first to help speed up that part of the process. Thank you so much for taking the time to share this!
Julie Goodhue says
I have used this recipe a lot as I am able to get A2milk from our local farmer and this is the only milk I can tolerate in my body. It turns out great everytime! Thank you very much!
The Lazy Slow Cooker says
I am so happy to hear that! Thank you so much for taking the time to share!!!
Bobbie says
This recipe is so easy and foolproof! Comes out great every time. Yummy!
The Lazy Slow Cooker says
I am so happy to hear that you like this! Thank you for sharing!!
Williams says
I accidentally left the yoghurt out for 13 hours before I put it in the fridge. Would it still be ok? It was cold in the house overnight, but I’m not sure if I should discard it or not.
The Lazy Slow Cooker says
The rule of thumb is that is can be left out for 6-8 hours. It's really hard to tell if your yogurt is safe or not, but I don't think I would take the chance. Sorry!
Mary says
Awesomeness, recipes.
The Lazy Slow Cooker says
Thank you so much!
Nicole Desaulnier says
can this recipe be halved?
The Lazy Slow Cooker says
As long as you watch the temperature at each step carefully, you shouldn't have any issues halving this recipe.
Bev Farmer says
I have a rectangular slow cooker,I used 3 liters of full cream milk. Put one liter in cooker with one cup of full cream milk powder, heated 2 liters in microwave 12 minutes. Poured that into the cooker with the other 1liter milk, left to reach required heat. turned off cooker and left to cool=took 2 hours.Added 1 cup live yogurt,wraped it all up in thick towel and 2 hours later I had 3 liters of realy thick greek yogurt. No straining.Never imagined I could use the slow cooker to make yogurt and not in the quantity Iwanted. Did a costing of ingredients and it came to a third of the price of the greek yogurt I had been purchaseing . I could not cost out the power used but that came in at 2 hours at prime cost.Thanks for your amazeing help.
Susan says
That is so great! I am so glad the explanation helped out. Thanks for taking the time to share!
Julie Goodhue says
Easy and lazy. Two things i like in our very busy household. Thank you. I have used this recipe for years and my family loves it.
Susan says
You have made my day by sharing that. Thank you so much!!
Melissa says
Hi! I tried making yogurt for the first time yesterday. It took 3 hours to get the temp down to 110° (Actually, I got it to 117°, then added yogurt.) Is it normal to take that long? How can I cool down faster? I wonder if a yogurt machine would be easier and faster? Tha k you!
Susan says
Hi, Glad to hear you tried this! It takes me 2.5 - 3 hours to cool the milk down to 110℉. To speed up the cool down process a bit, you can remove the insert from the slow cooker heating element. I would not recommend putting it in cool water or the refrigerator as this could cause the ceramic to crack.
I have never used a yogurt maker, but I believe you have to heat the milk up stove top and allow it to cool before you can add the yogurt starter and go to the next step. My understanding is that even with a yogurt maker, it is a 12 - 24 process from start to finish, depending on how thick you want your final product to be.
Carol says
Excellent recipe! Thank you!
Susan says
So happy to hear you enjoyed. Thank you for taking the time to come back and share!